Power Modes - SAM3S
ARM_POWER_SAVE.h
ARM_POWER_SAVE.c
If the MCU is erased and the finished board is powered up, the consumption is quite high as evidenced by the second row in the table below. This is predominantly caused by the microcontroller and GPS module. The MCU, being a permanent current consumer, is the first thing to look at closely. During the active periods some power saving can be done by running the chip at minimum speeds required by the specific application. For example the only time the MCU has to run at 64MHz is when sampling an image output by the camera module. During radio transmissions, which take up the most time, it's fine to run it at the XTAL frequency (12 or 16MHz depending on the physical crystal choice). For the resting periods SAM3S offers three low power modes out of which I use the WAIT mode. As opposed to BACKUP, this mode continues after waking up where it finished executing instructions while consuming datasheet stated 20uA. The intricacies of entering WAIT mode are described in the datasheet or taken care of in PS_enter_Wait_Mode() function. One requirement is switching the main clock to fast RC oscillator before calling it. After waking up the MCU runs at this RC oscillator's 4MHz clock frequency. The PLL offers a variety of frequencies for the MCU to run at and can be set up with PS_SystemInit() function according to rules described in the library.
| F3 | F5 | F8 | F9 | F10 | |
|---|---|---|---|---|---|
| erased chip | 58.1 | 57.5 | 72.8 | 99.1 | 67.2 |
| PLL 64MHz | 30.7 | 29.6 | 37.0 | 43.5 | 32.8 |
| XTAL 12/16MHz | 8.0 | 7.3 | 12.5 | 16.6 | 7.8 |
| PLL 1MHz | 5.5 | 2.8 | 8.1 | 14.0 | 3.1 |
| WAIT mode | 2.9 | 0.8 | 5.5 | 11.4 | 0.4 |
| 12MHz | 16MHz | 16MHz | 12MHz | 16MHz | |
| 3.32V | 3.33V | 3.38V | 3.40V | 3.31V |
With only the second row exception these are all results of measuring current consumption with the GPS module in backup mode, in other words, at least consumption. The MCU was put in each mode doing nothing else for 10s over which average consumption was measured. The table also contains the specific XTAL used on individual boards and the main operating voltages as supplied by TPS63031. A significant variability can be seen among the boards. Tests on a separate MCP1700T suggest that at least a portion of the excess current on some of the boards could be attributed to MCP1700T leaking current when operating voltage deviates from 3.3V. Also, F9 is equipped with a Biwin GM10 GPS module instead of a Ublox MAX-M8Q which may be partially responsible for the higher consumption. Another means of controlling the power required by the MCU lies in enabling and disabling peripheral clocks as they are needed. The datasheet states current consumption per every MHz of operating frequency for each peripheral. Once again higher the frequency, higher the total consumption. With the exception of System I/O lines all pins of the MCU are set as input with a pull-up enabled after reset. Generally I try to turn peripheral clocks off and re-enable the pull-ups on pins when I am done using the specific peripheral. Avoiding free floating pins and enabling pull-ups or pull-downs instead on pins set as input, or setting pins as output is the way to limit undesirable consumption as I come to understand.
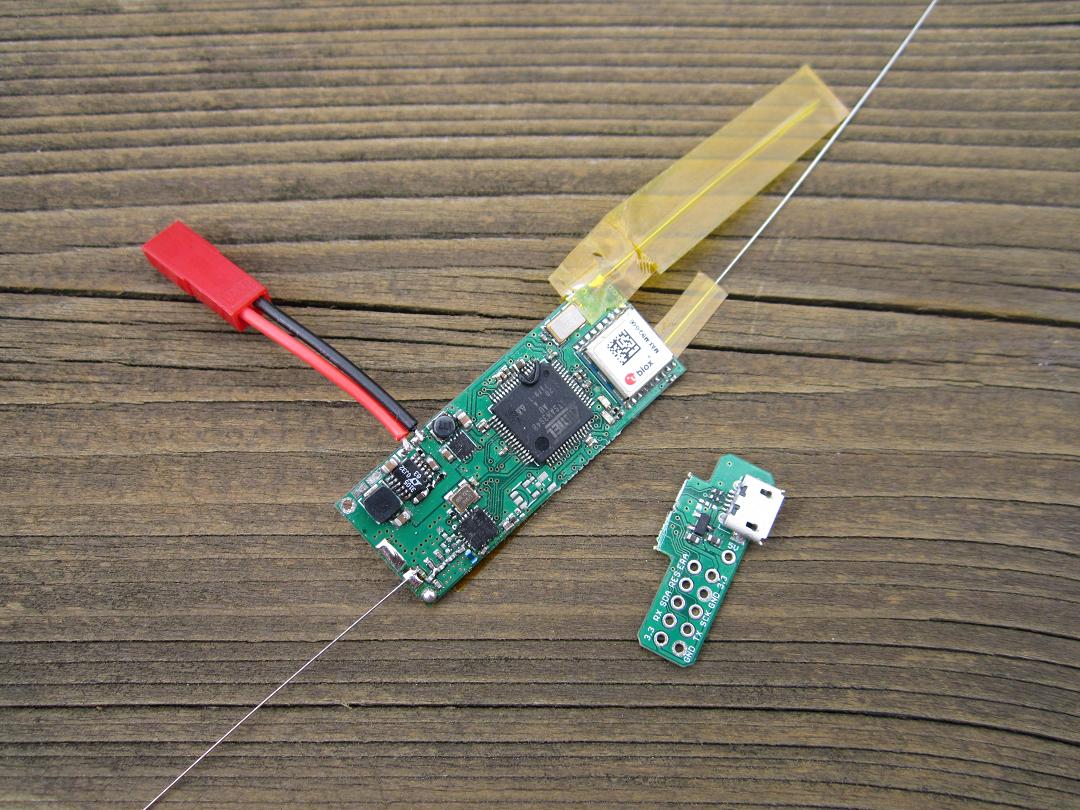
To shed some light on the marking of TT7F boards I use here: F1 is the first board used mostly for programming and testing. F2 was lost in the August flight. F3 is an old board with ATSAM3S8 from the original batch I made. F4, F6 and F7 were equipped with three faulty ATSAM3S4 MCUs and never worked. F5 is the only ATSAM3S4 board that works. F8, F9 and F10 are the new v1.5 boards with ATSAM3S8. F3, F5, F8, F9 and F10 are being prepared for superpressure flights.
Power Modes - UBLOX
ARM_UBLOX.h
ARM_UBLOX.c
The second continuous current consumer is the GPS module. I didn't design a hardware power cutoff on the board so any power saving has to be implemented in software. According to the datasheet the Ublox module is by default configured for the 1575MHz L1 C/A signal upon which the Navigation Message is modulated at 50bit/s. By receiving these messages the module acquires GPS date and time, Ephemerides of the specific satellites it is locked on and parts of Almanac. The module is equipped with 72 channels which means it can search for all the GPS satellites (31) at the same time. The average time to receive Ephemeris from a visible satellite is stated to be 27s and is valid for no longer than 4 hours. Its purpose is to give the precise satellite orbit for the following calculations. The module requires at least four satellites for a 3D solution. That means that at ideal signal conditions it requires at least the datasheet stated 29s to output position after a cold start (no previously acquired information). The Almanac takes up to 12.5 minutes to receive and because it contains only coarse orbits and other data it is valid for up to 180 days, however its acquisition isn't essential for a navigation solution. The receiver also provides several "Dynamic Platform Models" selectable in UBX-CFG-NAV5 message. These modes differ in their limits such as maximum altitude, maximum horizontal or vertical speed. For high altitude balloon purposes it is necessary to set the module to one of the Airborne modes (max altitude 50000m, horizontal/vertical speed 100m/s for Airborne <1g) otherwise it operates in the default Portable mode which is limited by a 12000m ceiling. In the following several paragraphs, however, I'd like to address the power saving modes U-blox modules have to offer.


| Mode | 5min avg | Mode | 5min avg | |||
|---|---|---|---|---|---|---|
| Continuous | 22.2 | mA | mA | Cyclic 1s | 10.6 | mA |
| Cyclic 2s | 5.1 | mA | ||||
| Cyclic 3s | 6.2 | mA | ||||
| Mode | 15min avg | Cyclic 4s | 8.0 | mA | ||
| ON/OFF 30s | 3.7 | mA | Cyclic 5s | 8.5 | mA | |
| ON/OFF 60s | 2.9 | mA | Cyclic 6s | 8.0 | mA | |
| ON/OFF 30s E | 5.9 | mA | Cyclic 7s | 8.9 | mA | |
| ON/OFF 60s E | 2.8 | mA | Cyclic 8s | 10.3 | mA | |
| Backup 30s | 3.7 | mA | Cyclic 9s | 8.2 | mA | |
| Backup 60s | 2.7 | mA | Cyclic 10s | 8.6 | mA |
The table shows average current consumption of the whole test for the individual modes. The LiPo supplying the tracker was at 4.01V. The Cyclic Tracking is particularly influenced by how many times and for how long the module exited the Power Optimized Tracking to search for better signals. Otherwise ON/OFF and manual BACKUP modes are favourites for the final implementation.
There is a couple of intricacies in setting up the Power Save Modes. I'll outline how I do it on TT7F. First I mention the name of a specific message, then in the parentheses the names of arrays that hold the configuration messages in the library above.
UBX-CFG-PRT (setNMEAoff[], setNMEAon[]) the module by default repeatedly outputs several NMEA messages that get in the way when parsing UBX protocol responses. This message can configure the module to output only the desired protocol.
UBX-CFG-GNSS (setGPSonly[]) according to the datasheet in protocol versions less than 18 (my modules are v15) Power Save Mode is supported only for GPS. That means that the other systems such as GLONAS, SBAS, etc. have to be disabled before entering PSM.
UBX-CFG-PM2 (setCyclicOperation_1s[], setONOFFoperation_perm[], etc.) this message selects the specific PSM, the update period, and it has to be configured before enabling PSM in UBX-CFG-RXM. Aside from the previously mentioned settings I always enabled doNotEnterOff bit to force the receiver to stay in Acquisition mode until it acquires a valid fix. This is also the message to enable updateEPH if desired.
UBX-CFG-RXM (setPowerSaveMode[], setContinuousMode[]) this is the message that actually switches the module between the predefined Power Save Mode and the Continuous Mode.
UBX-CFG-CFG (saveConfiguration[]) saves the current receiver configuration to internal Battery Backed RAM so the module upon waking up from Inactive or Software Backup modes can load it. In the ON/OFF PSM case it is necessary the message immediately follows setPowerSaveMode command.
UBX-CFG-PWR (setSwBackupMode[]) used to force the module into Software Backup mode. Waking up is done by rising or falling edge on the RXD1 pin, in other words by sending the module a dummy byte and providing it 500-1000ms to ensure reception of the following commands.
UBX-RXM-PMREQ (setBackupMode[]) another message to force Backup mode. I used this on MAX7 modules that didn't respond to UBX-CFG-PWR.
UBX-NAV-PVT (request0107[]) this message polls a complete navigation solution that contains year, month, day, hour, minute, second, fix type, PSM state, number of satellites, longitude, latitude, altitude, ground speed and heading.

Shutdown/Standby - Si4463 & MT9D111
ARM_MT9D111.h
ARM_MT9D111.c
ARM_SI4060.h
ARM_SI4060.c
In case of the transmitter (Si4463 and Si4060 are pin and to extent software compatible) all that needs to be done in terms of power saving is shutting it down when not in use. The Shutdown state is controlled by the SDN pin and the whole process is taken care of in SI4060_deinit() function. The function enables pull-up on ATSAM3S8's PB4 pin connected to GPIO1, resets the transmitter via the SDN pin to its default state and disables output on ATSAM3S8's PA8 pin which powers the TCXO. Re-initialization is done by SI4060_init() function which reverses the process. A couple of illustratory consumption plots can be found in The TT7F v1.5 Revision blog post.
The situation with MT9D111 camera module is similar. MT9D111_init() function initializes ATSAM3S8's pins connected to the camera (disable pull-ups, enable Parallel Capture Mode control). Subsequently a clock signal is provided to the camera via a PWM pin and PWM_init() function, the camera is reset and is either set up to output an image or ordered to a Standby state using MT9D111_standby() function. Disabling the PWM clock signal again the consumption decreases to the tracker's steady state power usage. There are two ME6211 regulators supplying the camera which should in total continually consume datasheet stated 100uA. A consumption plot with the camera module in use can be found in SSDV Slow Scan Digital Video blog post.
Solar Cells
The self-sustaining power supply is provided by LTC3105, a supercapacitor or a LiPo battery, and solar cells. At float altitudes the tracker can expect clear sky throughout the whole day. The on time is dependent on the Sun rising to a sufficient angle for the panel to generate enough power and the capacity of the supercap or battery for when the Sun sets again. The Sun's angle above horizon is determined by the tracker's current latitude and season of the year - the Earth's inclination to the incoming solar radiation. For example a floater at high latitude during winter time may experience only brief windows of activity around local noon.

| Collective Specs | ||
|---|---|---|
| Thickness | 200 | um |
| Efficiency | 17.6 | % |
| Temp. Coeff. of Voc | -0.241 | %/k |
| Temp. Coeff. of Isc | 0.033 | %/k |
| Temp. Coeff. of Pmax | -0.37 | %/k |
These are collective specs for all the different sizes of Polycrystalline cells (though they are Chinese Ebay specs, so who knows). Since the cell's efficiency is dependent on temperature the coefficients represent the percentage change in open circuit voltage, short circuit current and maximum power per one kelvin change in temperature. Reading about the test conditions there is a standardized methodology for evaluating solar cells consisting of exposing the tested cell to 1000W/m2 irradiance with AM1.5 spectral composition and cell temperature of 25°C.


| ° zenith | ° horizon | AM | W/m2 |
|---|---|---|---|
| 0 | 90 | 1.0 | 1053 |
| 30 | 60 | 1.2 | 1015 |
| 45 | 45 | 1.4 | 958 |
| 60 | 30 | 2.0 | 851 |
| 70 | 20 | 2.9 | 721 |
| 75 | 15 | 3.8 | 621 |
| 80 | 10 | 5.6 | 479 |
| 85 | 5 | 10.3 | 265 |
| 90 | 0 | 37.9 | 23 |
The Air Mass parameter represents the path length through Earth's atmosphere the incoming radiation has to travel. It is bound to the Sun's zenith angle and directly affects the final solar intensity. The table above provides several illustratory values for different Sun angles above horizon (based on Kasten and Young air mass model). For a floater purposes the eventual float altitude has to be taken into account. There is a couple of models that try to estimate AM at a given altitude, however, they produce intensity values equivalent to the Extraterrestrial Iradiance (1348W/m2) inside 9km of altitude already which is well below the expected flight levels of 11-16km. Given that and guessing the majority of attenuation in the wavelengths the cells are most sensitive to happens at lower altitudes I intend to use the 1348W/m2 intensity value in further estimates on a balloon at float altitude.


- Voc - the open circuit voltage measured across the solar cell's terminals.
- Isc - the short circuit current measured between the solar cell's terminals.
- Vmpp - the maximum power point voltage of a loaded cell.
- Impp - the maximum power point current of a loaded cell.
- Pm - the maximum power which equals Vmpp * Impp.
- Efficiency - the cell's electrical output divided by the incident light power. It depends on the specific solar cell technology/materials used (single-junction, multi-junction, monocrystalline, polycrystalline, GaAs, CdTe, etc.).
| X (mm) | Y (mm) | A (mm2) | Vmpp (V) | Impp (A) | Pmpp (W) | mW/cm2 |
|---|---|---|---|---|---|---|
| 39 | 19 | 741 | 0.50 | 0.24 | 0.12 | 16.2 |
| 52 | 19 | 988 | 0.50 | 0.28 | 0.14 | 14.2 |
| 39 | 26 | 1014 | 0.50 | 0.34 | 0.17 | 16.8 |
| 52 | 26 | 1352 | 0.50 | 0.43 | 0.22 | 15.9 |
| 78 | 19 | 1482 | 0.50 | 0.50 | 0.25 | 16.9 |
| 39 | 39 | 1521 | 0.50 | 0.52 | 0.26 | 17.1 |
| 52 | 38 | 1976 | 0.50 | 0.56 | 0.28 | 14.2 |
| 52 | 39 | 2028 | 0.50 | 0.68 | 0.34 | 16.8 |
| 78 | 26 | 2028 | 0.50 | 0.68 | 0.34 | 16.8 |
| 52 | 52 | 2704 | 0.50 | 0.86 | 0.43 | 15.9 |
| 78 | 52 | 4056 | 0.50 | 1.36 | 0.68 | 16.8 |
| 156 | 26 | 4056 | 0.50 | 1.12 | 0.56 | 13.8 |
| 78 | 78 | 6084 | 0.50 | 1.87 | 0.94 | 15.4 |
| 156 | 39 | 6084 | 0.50 | 2.00 | 1.00 | 16.4 |
| 156 | 52 | 8112 | 0.50 | 2.74 | 1.37 | 16.9 |
| 156 | 78 | 12168 | 0.50 | 4.10 | 2.05 | 16.8 |
| 156 | 156 | 24336 | 0.50 | 8.60 | 4.30 | 17.7 |
These are specifications as provided by various Ebay sellers I collected for different cell dimensions. Allegedly these should be maximum power point measurements, however, based on my own measurements on delivered cells I'd say they are rather the open circuit voltage, short circuit current and their product. The last column then provides a comparison of the provided specs in terms of mW/cm2 for individual sizes.


| Voc (V) | Isc (A) | |
|---|---|---|
| 2x 52x38 (flux) | 1.11 | 0.39 |
| 2x 52x26 (1) | 1.14 | 0.40 |
| 2x 52x26 (2) | 1.14 | 0.41 |
| 2x 52x38 (1) | 1.11 | 0.54 |
| 2x 52x38 (2) | 1.15 | 0.53 |
| 4x 52x26 | 2.31 | 0.40 |
| 4x 52x38 | 2.28 | 0.59 |
| 2x 2x 52x26 | 1.11 | 0.80 |
| 2x 2x 52x38 | 1.10 | 1.16 |
These are the values for different configurations measured around noon on a day with clear skies. The row denoted 'flux' represents a measurement on a pair of cells that ended up stained with flux after soldering them together and a following attempt to clean them with Isopropanol left them temporarily dark.
| P | Pmax | Vout 3.3V (Vin 1V) | Vout 5V (Vin 2V) | |||||
|---|---|---|---|---|---|---|---|---|
| Voc*Isc | 70% | 1mA 72% | 10mA 79% | 50mA 68% | 1mA 74% | 10mA 78% | 50mA 81% | |
| 2x 52x26 | 0.467 | 0.327 | 0.235 | 0.258 | 0.222 | |||
| 2x 52x38 | 0.610 | 0.427 | 0.307 | 0.337 | 0.290 | |||
| 4x 52x26 | 0.924 | 0.647 | 0.479 | 0.505 | 0.524 | |||
| 4x 52x38 | 1.345 | 0.942 | 0.697 | 0.734 | 0.763 | |||
| 2x 2x 52x26 | 0.888 | 0.622 | 0.448 | 0.491 | 0.423 | |||
| 2x 2x 52x38 | 1.276 | 0.893 | 0.643 | 0.706 | 0.607 | |||
This table provides a quick idea of the potential power at LTC3105's output (W). For this purpose Pmax was approximated to 70% of the product of Voc and Isc. LTC3105's input range of 0.25-5V suggests a possibility of using just one solar cell to up to about eight cells. The output set by a feedback voltage divider can be anywhere from 1.6V to 5.25V. The table illustrates several configurations with LTC3105's efficiencies at different conditions as found in the datasheet. The percentage values represent efficiency while the mA value the output current.
| 52x26 | 52x38 | ||||
|---|---|---|---|---|---|
| °horizon | W/m2 | 2c W | 4c W | 2c W | 4c W |
| 90 | 1348 | 0.337 | 0.674 | 0.492 | 0.984 |
| 70 | 1267 | 0.316 | 0.633 | 0.463 | 0.925 |
| 50 | 1033 | 0.258 | 0.516 | 0.377 | 0.754 |
| 35 | 773 | 0.193 | 0.386 | 0.282 | 0.565 |
| 25 | 570 | 0.142 | 0.285 | 0.208 | 0.416 |
| 15 | 349 | 0.087 | 0.174 | 0.127 | 0.255 |
| 5 | 119 | 0.030 | 0.059 | 0.043 | 0.087 |
| 1 | 24 | 0.006 | 0.012 | 0.009 | 0.017 |
This table provides LTC3105's power output estimates (W) under different Sun angles. Since it is an attempt to estimate power at float altitude of 11-16km I am for the sake of simplicity ignoring atmospheric absorption and using the Extraterrestrial irradiance of 1348W/m2 adjusted for the angle of incidence. The calculation assumes 75% LTC3105 efficiency and provides results for 2 and 4 cell systems.


Note. The values in the last two tables above assume Pmax out of the solar cells to be 70% of Voc * Isc. In actual measurements with these types of cells and my specific setup Pmax was inferred to be about 48% of Voc * Isc.
Supercapacitors
Supercapacitors should be more tolerant than LiPo batteries to the low temperatures the tracker experiences during nighttime. Throughout the day the Sun, aside from powering the setup, heats the electronics to their operating range. The negative side of supercaps is the inherently smaller capacity which generally means the tracker shuts down at some point after sunset.
| Enycap 220 series |
U (V) |
U1s (V) |
C (F) |
Tol. (%C) |
ESR (mΩ) |
IL0.5h (mA) |
IL72h (mA) |
E (Wh) |
M (g) |
|---|---|---|---|---|---|---|---|---|---|
| MAL222090003E3 | 2.7 | 2.85 | 15 | -20/+50 | 40 | 6 | 0.075 | 0.015 | 5.75 |
| MAL222091001E3 | 2.7 | 2.85 | 40 | -20/+50 | 18 | 20 | 0.200 | 0.041 | 9.65 |
Connecting two same supercapacitors in series increases the maximum voltage (2 * 2.7V -> 5.4V), decreases the capacity (2 * 40F -> 20F), the ESR increases (2 * 0.018mΩ -> 0.036mΩ) and the total leakage current stays the same (0.2mA). Connecting them in parallel leaves the maximum voltage the same (2.7V), increases the capacity (2 * 40F -> 80F), decreases the ESR (2 * 0.018mΩ -> 0.009mΩ) and increases the total leakage current (2 * 0.2mA -> 0.4mA).
The supercapacitor connects to LTC3105's output and to TPS63031 which is the main buck-boost converter supplying the board with 3.3V. Its minimum input voltage for startup is 1.8V and maximum 5.5V, however, once running it was repeatedly seen working down to ~1.55V at input. The converter's efficiency is between 75-90% depending on Vin.

| Energy (Ws) | 2.70V | 5.25V |
|---|---|---|
| 1x 15F | 54.7 | |
| 1x 40F | 145.8 | |
| 2x 15F parallel | 109.4 | |
| 2x 40F parallel | 291.6 | |
| 2x 15F series | 103.4 | |
| 2x 40F series | 275.6 |
All these electrical characteristics offer a number of options evaluated in the table above. It shows the energy in Ws held by the specific setup at the stated voltage. In the case of two caps in series 5.25V was chosen rather than 5.4V, because it is the maximum LTC3105 can output.


| Runtime (min) | 2.70V | 4.50V |
|---|---|---|
| 1x 15F | 25 | |
| 1x 40F | 65 | |
| 2x 15F parallel | 49 | |
| 2x 40F parallel | 131 | |
| 2x 15F series | 45 | |
| 2x 40F series | 119 |
The equation above calculates the time for which an application can source constant power from the charged supercap. The power used for the table was based on a test script and totaled to 0.025W. The minimum voltage was TPS63031's 1.55V and the charge voltage was dependent on the specific setup. The durations in the table are in minutes.
Some circuits with supercapacitors require a current limiting resistor so the empty cap doesn't try to source amperes of current initially. This isn't needed on TT7F, because the current is limited by LTC3105 itself and how much current it can output momentarily.


The difference between two supercaps connected in series or in parallel lies in the higher charging voltage in the series case and TPS63031's higher efficiency when down-converting to 3.3V compared to boosting the output from lower voltages. Whether it's worth the trouble of dealing with balancing or accepting the lesser efficiency is up to the specific application.
Concerning the long start times with the supercaps, or rather the time it takes to charge the empty cap to at least 1.8V at which the tracker begins to operate, it may not be as bad as it seems at first glance. In reality when the supercap's voltage falls to ~1.55V the tracker stops and it also stops draining the cap. So when the solar panels receive sunlight again they have to charge the cap only from ~1.55V to 1.8V to restart the tracker. I tested this by putting the 15F supercap in a freezer (-18°C) for 3 hours after it stopped supplying the tracker. Then when I re-connected it back, the two 52x38 solar pannels restarted the tracker in about 20 seconds. This was with ideal insolation, so the conditions aren't exactly comparable to sunrise, but it makes the point.
Lithium Polymer Batteries
Lithium polymer rechargeable batteries offer higher capacity at a comparable mass potentially being able to supply the tracker throughout the night. However, they don't do well with low temperatures which are inevitable at the expected float altitudes. Based on sounding data from mid Europe and Arctic latitudes the air temperature at 11-16km fluctuates between -40°C to -70°C throughout the year. It doesn't change much day to night, but absorption of the Sun's radiation seems to, according to on-board sensors, rise the temperature of the electronics to even several degrees above zero during the day. The operating tracker also generates some amount of heat which in combination with the substantially less dense air could maintain some warmth. However, in case of the low power setups the current draw is limited and the produced heat is insufficient. The tracker most likely comes close to the temperature of the surrounding atmosphere at some point during the night.

| Cellevia | mAh | Vmax | Vcut | Cchrg | Cdis | Cycles | °Cchrg | °Cdis | Wh | g |
|---|---|---|---|---|---|---|---|---|---|---|
| LP601730 | 250 | 4.2 | 2.75 | 1 | 1 | 300 | 0/+43 | -10/+55 | 0.925 | 6.0 |
| LP403035 | 400 | 4.2 | 2.75 | 1 | 1 | 300 | 0/+43 | -10/+55 | 1.480 | 8.4 |
For starters I ordered a couple of LiPos the local electronics distributor had in stock. They are by Cellevia Batteries and have integrated protection circuit module which cuts off the cell if the voltage falls below 2.75V. This is important, because TPS63031 would otherwise try to drain it to about 1.55V which would destroy the cell. Apparently under-voltage leads to the electrodes dissolving into the electrolyte potentially causing shorts.
The expected discharge while powering the tracker is a few milliamps during idle periods with several seconds in the range of 50mA when the GPS module is active or the tracker transmits. In case of using the camera the consumption can rise to about 150mA for a few seconds when the tracker takes an image followed by several minutes of continual transmission in the range of 30-50mA. Image taking should thus be restricted to day time only, because the falling temperture will decrease the battery's capacity, voltage and will increase the battery's internal resistance limiting the instantaneous power output. Batteryuniversity.com states the capacity loss of Li-ion cells to be about 17% at 0°C, 34% at –10°C and 47% at –20°C.
According to the datasheet charging should occur at 0°C to 43°C and should consist of providing constant current of 0.2C to the cell until it reaches 4.2V. Then providing constant voltage of 4.2V until the current falls below 0.05C. All this taking up 8 hours. Or quick charging the same way at 0.5C current in 2.5 hours. This is, however, unlikely to happen with solar cells and the Sun gradually rising above horizon and slowly heating the tracker from freezing temperatures.
The main danger seems to be permanent Lithium plating on the anode. If charging at very low temperatures, the ions instead of intercalating into the graphite electrode get deposited on the surface. This decreases the capacity and potentially forms dendrites which may eventually short the electrodes together. However, this article states that below freezing temperature charging is possible with most of Li-ion cells, but only at very low currents. It then mentions an example rate of 0.02C at -30°C. Arguably the current initially provided by the rising sun could be proportionally small.
With the negative electrode generally made from graphite C6 on a Copper sheet, the positive electrode made from LiCoO2 on an Aluminium sheet, it is apparently the electrolyte and its additives that provide variability in terms of performance of the resulting cell. There should be mixtures allowing the battery to operate to -40°C on the market. Though it may require some digging. The cells I have most likely aren't low temp, but I consider it worth it to test them on one or two flights.
According to What Causes Li-ion to Die charging to only 3.92V maximizes the battery's longevity, but as a result provides only about 60% capacity. It may be worth a try.
Another option to test is connecting a smaller supercapacitor in parallel with the battery. In this way the supercap could satisfy the instant current demand during TX periods while slowly recharging during idle periods relieving some of the demands on the battery overnight.
Timing the Power Modes
ARM_RTT.h
ARM_RTT.c
ARM_RTC.h
ARM_RTC.c
In principle there are more ways to schedule transmissions and low power periods. One for example is to synchronize tx to the start of every GPS minute. Another way is to simply wait a preset duration between transmissions.
The Real-time Clock (RTC) peripheral in principle offers, after initial synchronization with GPS time, means of timing the transmission and wait periods. Unfortunately, in case of TT7F the clock is driven by an internal RC oscillator which is inaccurate and temperature sensitive. As a result the clock on the tested tracker lags 12s every minute at room temperature. This would most likely further fluctuate as the tracker got colder at night and warmer in sunlight. The Real-time Timer (RTT) is driven by the same RC oscillator and hence suffers from the same downfall.
For these reasons and no actual need to synchronize transmissions to GPS time I decided for simplicity. The RC oscillator's inaccuracy and the fact that the GPS module spends the idle periods in backup mode mean the tracker can't at any moment immediately know the precise time without wasting power on additional activity of the GPS module. Hence I chose an RTT timed Wait mode period which adds to more or less one minute cycle with average GPS fix and transmission durations included. The time it takes the GPS module to acquire fix upon waking up is the most variable factor. I also added a condition which prolongs this cycle to about two minutes if the solar panel voltage falls below a defined limit.
Watchdog
ARM_WATCHDOG.h
ARM_WATCHDOG.c
Watchdog provides a safety feature in case some part of the code gets stuck. It is a timer the application periodically restarts, otherwise the timer runs out (the code got stuck somewhere), the Watchdog resets the MCU and the code execution starts from the beginning again. It uses the microcontroller's Slow Clock divided by 128 which is driven by the internal RC oscillator. That means it suffers from the same inaccuracies as RTC and RTT.
void WATCHDOG_disable(void)
{
    WDT->WDT_MR = WDT_MR_WDDIS;    // disable WatchDog
}
Watchdog is enabled by default so in case the application doesn't need it, it has to be disabled at the beginning of the code.
void WATCHDOG_enable(uint16_t period, uint8_t idleHalt)
{
    period &= 0x0FFF;    // WatchDog Timer is 12-bits

    WDT->WDT_MR = (idleHalt << 29) | (period << 16) | WDT_MR_WDRSTEN | (period << 0);
}
In case it does use it this function sets up the timer's period (4ms - 16s). The IDLEHALT bit allows employing Watchdog in applications with long sleep periods such as this one by stopping the timer when the system is in Wait mode. Watchdog can be programmed only once in the code.
void WATCHDOG_restart(void)
{
    WDT->WDT_CR = (0xA5 << 24) | WDT_CR_WDRSTT;    // restarts the WatchDog
}
This function serves to restart the timer and has to be called at logical places to allow normal operation. The calls are application specific and will depend on whether SSDV is used, or not, on how long it takes to transmit RTTY telemetry, on how long it takes to get the GPS lock, etc.
It is a question whether it is necessary to use Watchdog at all. At least in case of supercap setups there is a guaranteed MCU reset every night when the power runs out. So unless it is a frequently reoccurring failure the next day provides a fresh start.
Software
ARM_TT7F1.c
This is the main code running the first low power tracker built and described in this blog post callsigned TT7F1. The core blocks of the code are expected to be the same in the other setups as well. There will be minor differences in limits, timing, power saving schemes, etc. in the individual trackers. A couple should also have an additional SSDV block.


Concerning the chosen 2.5V limit being relatively close to the maximum 2.7V potentially not providing much space. I left the supercap inside a freezer (-18°C) for a while, then powered the tracker with it and watched the voltage on a multimeter. The low temperature didn't seem to lead to any observable voltage drop.

TT7F1 Final Setup
In this section I'll document finalizing the TT7F1 setup to a launchable state. Most of the things and tests previously addressed in this blog post were done with this particular tracker.